The Command Line Builder
Last week we introduced the command line builder to all our Validator tools – Bug Validator, Coverage Validator, Memory Validator, Performance Validator and Thread Validator.
All our tools provide command line support allowing you to use them from your favourite automation tool, be that a set of batch files, or something more comprehensive like Jenkins.
Command lines are great, but writing out your command line can be daunting, even if like me, you’ve done it many times. It’s not that it’s hard, it’s just that you don’t do it very often so the options are never top of mind, you’re going to have to go and look at the dreaded documentation.
Yup, documentation, even when it’s as good as ours is, you’re still reluctant to look at it. I know the feeling. You’ve got so used to using a nice GUI that it seems odd to look at the help. But you’ve got to do that if you’re going to write a command line for a tool.
That’s where the Command Line Builder comes in. To reduce the amount of time spent looking at the documentation, and to reduce the likelihood of you making mistakes when creating your command line.
How do I start the command line builder?
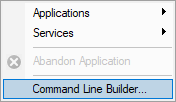
The command line builder can be started from the Launch menu and from any of the Launch dialogs and Launch wizards.
Launch Menu
When the command line builder is started from the launch menu you are presented with a set of choices that allow you to preconfigure the command line builder.
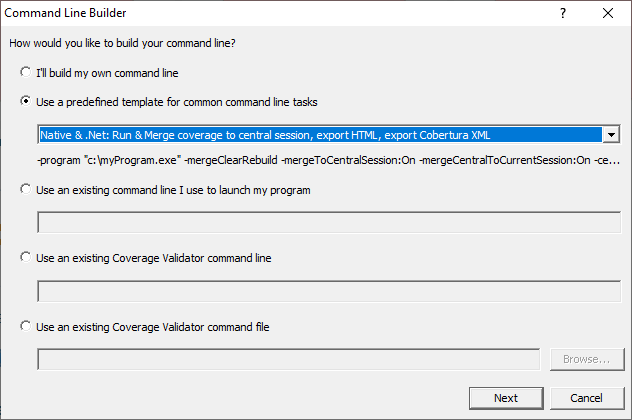
The choices provided aim to cover every possible way of using the Validator.
- Build my own command line.
- Use a predefined template that provides the command line arguments for common command line tasks. These templates are configured specific to the validator being used. If the Validator supports .Net and .Net Core as well as native there will be .Net specific templates and .Net Core specific templates. If the Validator can also do specific things like merging sessions or comparing sessions, templates for these actions are also provided.
- Use an existing command line I use to launch my program. You know what you’d type on a command prompt to launch your program. Type that here and let the command line builder turn that into a command line for the Validator.
- Use an existing Validator command line. Reuse a command line you already have and tweak it a bit to do the new task.
- Use an existing Validator command file. Reuse a command file you already have and tweak it a bit to do the new task.
With the exception of the first option that allows you to build your command line from scratch, all of these options are present to enable you to save time when building your command line.
Once you’ve chosen your option (and template if you’re using a predefined template) you need to move to then next stage, with the thoughtfully named Next button.
Launch dialog / wizard
When you start the command line builder from a launch dialog or wizard it’s via the Cmd Line… button.
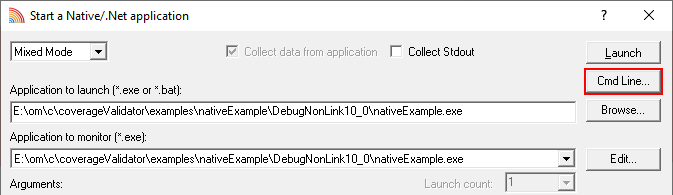
When you start the command line builder this way, a command line is built based on the options you have selected on the launch dialog/wizard, and then passed to the command line builder. This allows you to select a known good command line you’ve previously used then click the Cmd Line… button and instantly be able to configure that command line in the command line builder.
Command Line Builder dialog
Once you’ve started the command line builder you’ll be presented with a dialog that will look very similar to this. This example is using a preconfigured template for Coverage Validator that merges coverage data to a central session, exports HTML and XML coverage data, and saves the coverage session.
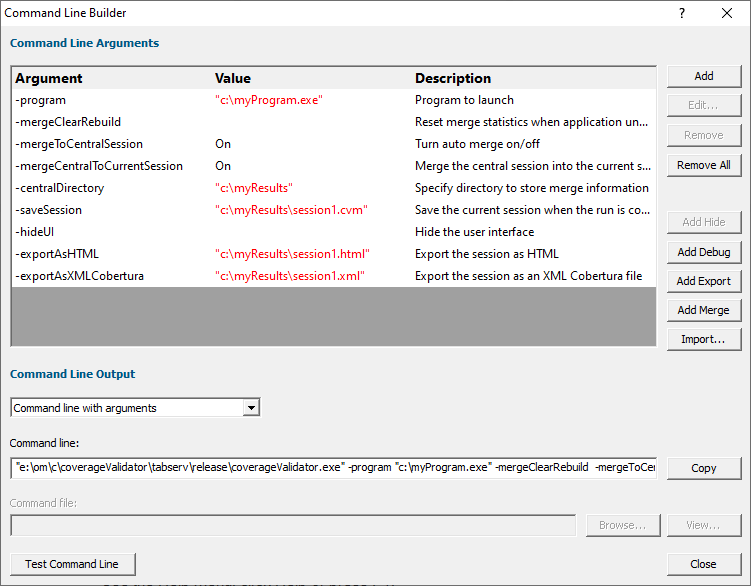
The first thing you’ll notice is there are many argument values highlighted in red. These are values that are incorrect. This is because they are from a template and you’ll need to edit them to match your own working practices. In this example you’ll need to edit the program being tested and change c:\myResults to be where you wish to save your test results and edit the filenames to something meaningful for your tests.
Each command line argument is displayed on it’s own line, with a value (for the arguments that have a value) and a description of what this argument/value pair represent. If you need help, the ? button in the dialog border will take you there.
Editing
The buttons on the right hand side provide simple editing of the list of argument values to allow you to Add an argument, Edit an argument or value, Remove an argument and Remove All arguments. You can also start editing any existing argument or value by double clicking it.
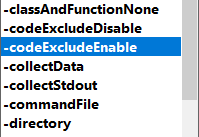
Editing an argument presents you with a combo box of valid Validator argument values, preventing you from entering incorrect command line arguments.
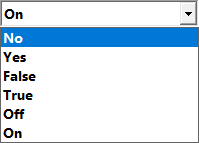
Boolean: Editing a value that is an On/Off, Yes/No, True/False type of argument presents you with those choices.
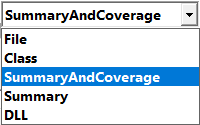
Enumerations: Editing a value that is an enumeration will only show you valid enumeration values.
Directories: Editing a value that needs a directory will open a directory chooser dialog.
Files: Editing a value that needs a file will open a file chooser dialog set to choose that type of file.
All other editing types use a standard text dialog, with limited text input (for example integer values only allow integer input).
As you can see we are trying to reduce the scope for input error as much as we can.
Additional Customization
Next to the editing controls are some customization controls which allow you to add command line arguments (and associated values) to your command line if they are not already present.
Add Hide adds the -hideUI argument which you will need if you are writing command lines for automated use that close the Validator after the target program finishes.
Add Debug adds options to help debugging failures with the command line. These options ensure the command prompt is displayed, that the arguments you think you are supplying are the arguments you’ve supplied, displays error information on the command prompt and displays error information in a message box.
Add Export adds options for exporting in HTML and XML. For Coverage Validator an additional XML Cobertura export option is available.
A fourth button is displayed for some Validators. This provides options specific for that Validator, for example merging coverage data, or comparing memory leak reports or comparing performance reports. In the image show above you can see Add Merge, which is for Coverage Validator.
The last button allows you to Import an existing command file. Using this destroys all existing arguments and replaces them with the values in the command file.
Creating the command line
Once you’ve finished creating your command line the next thing is to get the command line in a form that you can use. We provide two forms of command line creation. The normal command line that most people expect and a much shorter command line combined with a command file that contains the actual command line instructions for the Validator.
The choice of command line is made using the combo box towards the lower half of the dialog.
Command line with arguments
This option is the typical command line that people expect. It starts the Validator and passes all command line arguments and values to the Validator.
The command line is updated each time the arguments and values are edited.
The Copy button copies the command line to the clipboard.
Command line with command file
This option provides a short command line that loads the command file, with the command file containing all the command line instructions for the Validator. There are two reasons for using the command file:
- A shorter command line. Current versions of Windows support very long command lines. Earlier versions of Windows supported much shorter command lines – it was quite easy to construct a Validator command line that was too long for Windows to process, resulting in incorrect behaviour when you tried to use the command line. Using the command file allows you to specify long command lines on older operating systems.
- Simplifying command line management. Storing all your command lines in command files allows you to easily manage the command files, storing them all in one place. It also allows some indirection, allowing you to edit the command line without editing the script/tool that invokes the Validator.
When you choose to use a command line with a command file, if you have not specified a command file to use you will be prompted for a command file name. When a command file name is specified the command file will be updated each time the arguments and values are edited.
The Browse… button allows you to use a file browser to choose a command file name. The View… button allows you to view the command file in your favourite editor.
Testing
Once you have created the command line arguments and values, and chosen the type of command line you want to use, you may want to test the command line. This is done by using the thoughtfully named Test Command Line button.
If all goes well a new Validator instance will be launched with your command line, and some time later the target program will complete.
Unfortunately not all command lines are equal, and some will fail to run correctly. So how do you debug that?
Incorrect program
If you have misconfigured the command line (for example: by specifying a 64 bit program to be tested by a 32 bit Validator) you will not get the behaviour you expect.
If you have specified the startup program correctly but failed to ensure that all dependent DLLs can be found the program won’t start, or it will start and then fail shortly afterwards. Check you can start the program in this directory by double clicking it – if that doesn’t work you’ve probably got a missing dependency. You can check your dependencies using PE File Browser.
If you have specified a startup directory that does not exist, the program won’t start.
Unable to see error dialogs and warning dialogs
If you have specified -hideUI you won’t be able to see what happens. If you are having problems, the first thing to try is to change -hideUI to -showUI and test again to see if any warning dialogs are displayed.
Show the command prompt
-showCommandPrompt to ensure the command prompt can be seen. You may find a helpful error message waiting for you.
Check the arguments supplied
-echoArgsToUser to check the arguments supplied are what you think they should be.
Ensure you can see errors
-showErrorsWithMessageBox when your program has a graphical user interface to display any error messages with a message box.
-showErrorsOnCommandPrompt when your program is a console program to display any error messages on the command prompt.
Conclusion
The Command Line Builder simplifies the creation of valid command lines for use with the Validator tools. We’ve tried to eliminate errors by making it easier to create valid command lines while also highlighting errors with proposed command line values.